

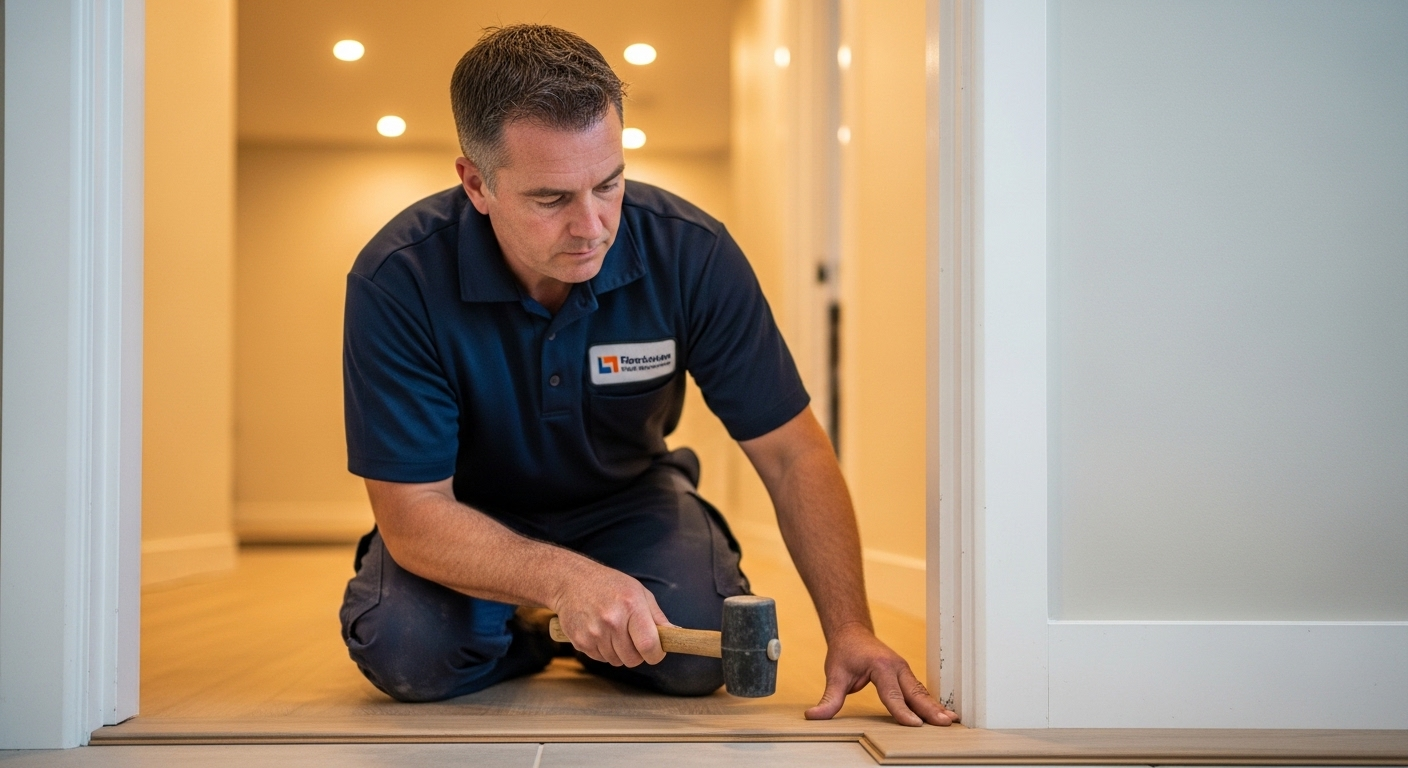
Did you know that laminate is one of the most popular flooring choices in American homes, with millions of square feet installed every year? If you’ve been searching for a clear, reliable guide on how to install laminate flooring , you’re in exactly the right place.
This article walks you through the entire process — from subfloor preparation and underlayment selection to snapping the first plank into place and finishing the edges with trim. Whether you’re a first-time DIYer or someone comparing options before hiring a professional, understanding how to install laminate flooring correctly will help you avoid costly mistakes and get a result that looks great for years.
Keep reading to discover every step of the process — or learn when it makes sense to call in a trusted flooring contractor like Prime Epoxy Flooring.
Ready to skip the DIY work entirely? Request a free quote from Prime Epoxy Flooring — serving Wilmington, DE and surrounding communities.

What Is Laminate Flooring?
Laminate flooring is a multi-layer synthetic product engineered to replicate the look of hardwood, stone, or tile at a significantly lower price point. It’s made up of four main layers: a wear layer that resists scratches and stains, a decorative printed layer, a high-density fiberboard (HDF) core, and a backing layer that provides moisture resistance.
Unlike solid hardwood, laminate cannot be sanded or refinished. Its durability comes from the HDF core and an aluminum oxide coating on the surface. It works well in living rooms, bedrooms, and hallways, though it is generally not recommended for spaces with standing water, such as bathrooms and laundry rooms.
If you’re considering other options for your home, Prime Epoxy Flooring offers professional hardwood flooring installation in Wilmington, DE and luxury vinyl plank flooring for moisture-prone areas.
Why Knowing How to Install Laminate Flooring Correctly Matters
Understanding how to install laminate flooring the right way saves you time, money, and frustration. Material costs typically range from $1.50 to $4.00 per square foot, with professional installation adding another $1.50 to $3.00 per square foot. A properly installed laminate floor can last 15 to 25 years with minimal upkeep.
When homeowners attempt this project without proper guidance, the most common results are buckling near walls, squeaking underfoot, and visible gaps between planks. These problems almost always trace back to three errors: skipping the acclimation period, choosing the wrong underlayment, or ignoring expansion gaps.
That’s why so many homeowners search for how to install laminate flooring before they start — because the preparation phase matters just as much as the installation itself.
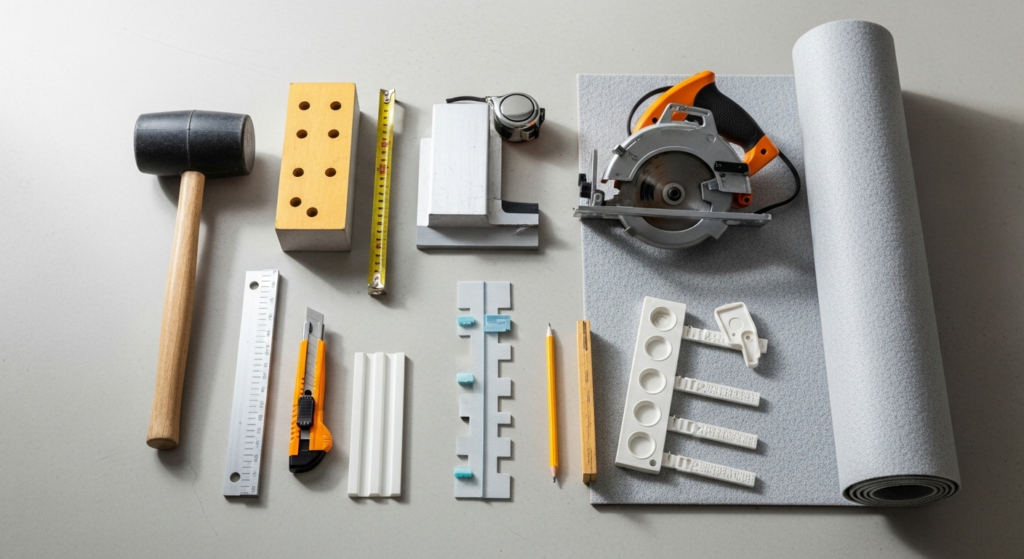
Tools and Materials You Need Before You Start
Before you begin, gather everything you need. Starting the job with incomplete tools is one of the most common reasons a laminate flooring project stalls halfway through.
Tools needed:
- Tape measure and pencil
- Rubber mallet and tapping block
- Pull bar for end joints near walls
- Jigsaw or circular saw
- Utility knife
- Plastic spacers (3/8 inch)
- Chalk line
- Long straightedge or level
- Knee pads
Materials needed:
- Laminate flooring planks (add 10% overage for straight layouts; 15% for diagonal)
- Underlayment or acoustic underlayment (if not pre-attached to planks)
- Vapor barrier (required for concrete subfloors)
- Transition strips
- Baseboard molding or quarter-round
Not sure which laminate product fits your space and budget? Browse the laminate flooring service page at Prime Epoxy Flooring to explore options and request pricing.
How to Install Laminate Flooring: 7 Steps to a Flawless Result
This is the core of this guide. These seven steps cover how to install laminate flooring from start to finish, following the same sequence used by professional installers.
Step 1: Acclimate the Planks to the Room
The first thing to understand about how to install laminate flooring correctly is that the planks must adjust to the temperature and humidity of the room before they’re touched. Leave the unopened boxes flat in the room for 48 to 72 hours. The ideal conditions are between 60°F and 80°F with relative humidity between 35% and 65%.
If you skip this step, the planks will absorb or release moisture after installation and expand or contract, causing the floor to buckle. In Delaware and Pennsylvania, where seasonal humidity swings are common, this step is especially important.
Step 2: Prepare and Inspect the Subfloor
A critical part of how to install laminate flooring is ensuring your subfloor is clean, dry, flat, and structurally sound. Use a long level or straightedge to check for high and low spots. The acceptable tolerance is no more than 3/16 inch over 10 feet.
Sand down high spots with a floor grinder and fill low spots with a self-leveling compound. Check for protruding nail heads and remove them or set them below the surface. For concrete subfloors, tape a plastic sheet flat against the floor for 24 hours. If condensation forms underneath, you have a moisture problem that must be resolved before any flooring goes down.
Step 3: Install the Underlayment
Underlayment performs four functions: moisture protection, acoustic dampening, slight thermal insulation, and minor surface leveling. Roll it out parallel to the direction your planks will run. Overlap the seams by about 4 inches and tape them with seam tape.
For concrete subfloors, use an underlayment with an integrated vapor barrier, or lay a 6-mil polyethylene sheet first. Do not layer two separate underlayment materials — this creates an unstable base and can cause the click-lock joints to crack over time. If your planks come with pre-attached underlayment, skip the separate roll entirely.
Step 4: Plan Your Layout
Good layout planning is one of the most overlooked aspects of how to install laminate flooring successfully. Measure the room width and divide by the plank width. If the final row would be less than 2 inches wide, trim the first row narrower so both the first and last rows are balanced in width.
Run the planks parallel to the longest wall in the room, or parallel to the main light source. This makes the room look wider and hides the seams more effectively. Snap a chalk line 3/8 inch from the starting wall to use as your guide for the first row.
Step 5: Lay the First Row
Place the first plank with the tongue side facing the wall and insert 3/8-inch spacers between the plank edge and the wall. Maintain this gap consistently along both the long wall and the short end walls.
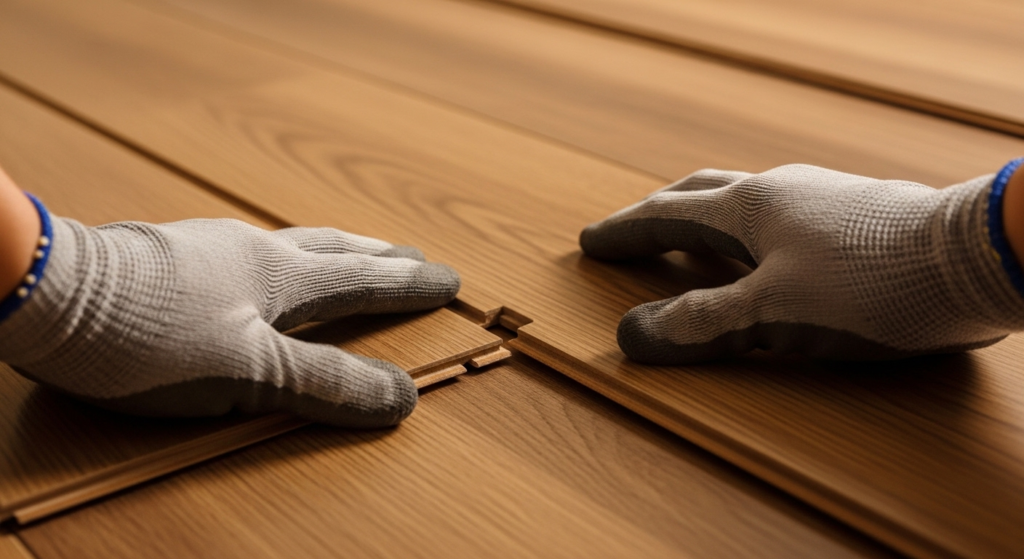
Connect planks end-to-end by angling the short end at about 20 to 30 degrees, pressing down, and tapping gently with the rubber mallet and tapping block. Never strike the plank directly. Measure and cut the final plank of the first row to fit. Save the cut-off piece to start the next row — it must be at least 8 to 12 inches long to maintain proper joint stagger.
Step 6: Install the Remaining Rows
Stagger the end joints by at least 12 inches between adjacent rows. This is both a structural and aesthetic requirement. Connect each new row at a 20 to 30-degree angle along the long edge, pressing flat until you hear and feel the click-lock engage.
Use the pull bar near walls where the rubber mallet cannot reach. Check alignment with your chalk line every three to four rows to make sure the layout isn’t drifting. When cutting around door frames, undercut the frame casing with a handsaw so the plank slides underneath, rather than notching the plank to fit around it.
Step 7: Install Transitions and Baseboards
Once all planks are installed, remove every spacer. Install transition strips at doorways and wherever the laminate meets another flooring type. Use a T-molding where floors are at the same level, and a reducer strip where there’s a height difference.
Reattach or install new baseboard molding or quarter-round to cover the expansion gap along all walls. Nail or glue the molding to the wall only — never to the floor planks. The floating floor system only works when the planks are free to expand and contract with seasonal changes. This final step completes the laminate floor installation.
Common Mistakes to Avoid When Installing Laminate Flooring
Even homeowners who have researched how to install laminate flooring carefully can run into these errors. Knowing them before you start is your best defense.
| Mistake | Why It Happens | How to Avoid It |
|---|---|---|
| Skipping acclimation | Impatience | Wait 48–72 hours minimum |
| No expansion gap | Forgetting spacers | Use 3/8″ spacers at all walls |
| Uneven subfloor | Skipping prep | Level before installation |
| Wrong underlayment | Choosing cheapest option | Match underlayment to subfloor type |
| Short stagger joints | Poor layout planning | Stagger end joints at least 12 inches |
| Installing over moisture | Not testing subfloor | Always test concrete before starting |
| Nailing baseboard to floor | Misunderstanding float system | Nail molding to the wall only |
How Long Does It Take to Complete a Laminate Flooring Installation?
One of the most common questions from homeowners exploring how to install laminate flooring is how much time the full project takes. The answer depends on room size, subfloor condition, and experience level.
- Acclimation: 48 to 72 hours (mandatory, cannot be shortened)
- Subfloor preparation: 2 to 4 hours for a standard 200 sq ft room
- Underlayment installation: 30 to 60 minutes
- Plank installation: 4 to 8 hours for 200 to 400 sq ft
- Trim and finishing: 1 to 2 hours
For a typical 300 sq ft room, an experienced DIYer can finish the physical installation in a single day, not counting acclimation. A professional crew from a company like Prime Epoxy Flooring can typically complete the same job in 3 to 5 hours.
Laminate vs. Other Flooring Options: Making the Right Choice
Understanding your options makes it easier to decide whether learning how to install laminate flooring is even the right path for your specific room and budget.
| Feature | Laminate | Hardwood | Luxury Vinyl Plank | Tile |
|---|---|---|---|---|
| Material cost | $1.50–$4/sq ft | $4–$12/sq ft | $2–$7/sq ft | $1–$10/sq ft |
| Water resistance | Moderate | Low | High | Very High |
| DIY friendliness | High | Medium | High | Low |
| Lifespan | 15–25 years | 30–100 years | 20–30 years | 30–50 years |
| Refinishable | No | Yes | No | Partial |
| Best application | Bedrooms, living areas | All rooms | Kitchens, baths | Wet areas |
Prime Epoxy Flooring installs all of these flooring types across Delaware and Pennsylvania. Explore their services:
- Hardwood flooring in Wilmington, DE
- Luxury vinyl plank flooring in Greenville, DE
- Tile installation in King of Prussia, PA
- Hardwood flooring in Media, PA
- Hardwood flooring in Norristown, PA
- Luxury vinyl plank flooring in Broomall, PA
Not sure which floor type is right for your space? Contact Prime Epoxy Flooring for a free consultation. We serve Wilmington, Newark, Bear, Middletown, Smyrna, Norristown, Media, and all surrounding areas.

Real Customer Experiences from Prime Epoxy Flooring
Homeowners across Delaware and Pennsylvania rely on Prime Epoxy Flooring for professional installations. Here’s what some of them have shared:
Marcus T. — Wilmington, DE (Google Review)
“Prime Epoxy Flooring installed laminate throughout our first floor. They were on time, clean, and the result was absolutely stunning. I couldn’t believe how fast they worked. 5 stars, no question.”
Jennifer R. — Newark, DE (Google Review)
“I had tried to tackle how to install laminate flooring myself and ended up with buckling near the sliding door. Prime Epoxy came in, corrected the issue, and completed the rest of the house. They explained every step and were a pleasure to work with.”
David M. — Norristown, PA (Google Review)
“Professional, fair pricing, and great communication. They helped me choose between laminate and luxury vinyl for my kitchen and gave me honest advice instead of just trying to upsell. Will definitely use them again.”
View more completed projects at the Prime Epoxy Flooring gallery or visit their FAQ page for answers to common flooring questions.
Can You Install Laminate Flooring in Every Room?
This is one of the most frequent questions that comes up when homeowners research how to install laminate flooring . The short answer is no — laminate is not suitable for every space.
Rooms where laminate works well:
- Living rooms and family rooms
- Bedrooms and hallways
- Home offices and dining rooms
- Finished basements (with proper moisture barrier)
Rooms where laminate is not recommended:
- Bathrooms and half-baths
- Laundry rooms
- Mudrooms with direct outdoor access
- Kitchens with potential for standing water near the sink or dishwasher
For wet or high-moisture areas, luxury vinyl plank is a far better choice. Check out Prime Epoxy Flooring’s LVP options in Glen Mills, PA and Norristown, PA as alternatives.
Recommended Tools, Brands, and External Resources
When planning how to install laminate flooring on your own, investing in quality tools makes a noticeable difference in the final result.
Recommended tools:
- Bosch laser level — ensures perfect alignment across long rooms
- DEWALT DCS565B circular saw — clean, accurate cuts on laminate planks
- Roberts 70-193A underlayment — highly rated vapor barrier for concrete subfloors
- Stanley FatMax tape measure — durable and accurate for layout planning
Trusted laminate brands:
- Pergo — one of the most recognized names in residential laminate
- Quick-Step — excellent warranty and wide style selection
- Shaw Floors — consistent quality at a range of price points
Helpful external resources:
- The Home Depot Flooring Installation Guide — external authority link
- Angi: Find Flooring Professionals Near You — external authority link
- Houzz: Laminate Flooring Ideas and Inspiration — external authority link
Seasonal Note: When Is the Best Time to Start?
The topic of how to install laminate flooring is perennial — people search for it year-round — but it peaks sharply in spring (March through May) as homeowners begin renovation projects, and again in early fall (September through October) before the holiday season.
Avoid starting installation during periods of extreme humidity above 70% or temperatures below 55°F unless you can control the room environment. In Delaware and Pennsylvania, spring and early fall offer the most stable indoor conditions, making the acclimation process more predictable and effective.
Frequently Asked Questions
Can I install laminate flooring over existing tile or hardwood?
Yes. You can install laminate flooring over existing tile or hardwood as long as the surface is flat within 3/16 inch per 10 feet, clean, dry, and structurally sound. High spots need to be sanded down and low spots filled before you begin. Avoid installing over carpet or any surface with active moisture problems.
How much laminate flooring do I need to buy?
Measure the room’s square footage (length multiplied by width) and add a 10% overage for straight layouts or 15% for diagonal patterns. Always purchase from the same production lot to ensure consistent color and grain matching across the entire floor. Leftover planks are also useful for future repairs.
Do I need underlayment if my laminate already has it attached?
No. If your planks come with pre-attached underlayment, do not add a separate foam layer. The one exception is when installing over concrete — in that case, add only a thin 6-mil polyethylene vapor barrier beneath the planks, not an additional foam underlayment.
What is the expansion gap and why is it required?
The expansion gap is the space — typically 3/8 inch — left between the edge of the laminate floor and all walls, door frames, columns, and fixed objects. Because laminate expands and contracts with changes in temperature and humidity, this gap gives the floor room to move. Without it, the floor buckles and lifts. The gap is hidden after installation by baseboard molding or quarter-round.
When should I hire a professional instead of attempting this myself?
Consider hiring a professional when the subfloor requires significant leveling, when moisture is present, when the room has complex angles or multiple doorways, or when the project size exceeds your comfort level. Prime Epoxy Flooring serves homeowners across Wilmington, Newark, Middletown, Smyrna, Edgemoor, Rehoboth Beach, King of Prussia, Broomall, and Greenville, DE.
Conclusion
Learning how to install laminate flooring is genuinely achievable with the right preparation and tools. The seven steps covered in this guide — acclimation, subfloor preparation, underlayment, layout planning, laying the first row, completing the installation, and finishing with transitions and molding — represent the same process professional crews use on every project.
That said, not every homeowner wants to spend a weekend on their knees measuring planks and cutting transitions. And when subfloor issues, moisture problems, or complex room layouts are involved, a professional installation pays for itself in long-term durability.
Prime Epoxy Flooring offers expert installation of laminate, hardwood, tile, luxury vinyl plank, stairs flooring, epoxy flooring, and decking throughout Delaware and the Pennsylvania suburbs. Visit the about us page to learn more, or check out the project gallery to see completed installations.
Ready to get started? Contact Prime Epoxy Flooring today for your free estimate. We are available Monday through Friday from 8AM to 5PM and Saturday from 8AM to 12PM.
Phone: +1 (302) 600-2835
Email: info@primeepoxyflooring.com
Address: 300 Cassidy Dr Ste 305, Wilmington, DE 19804
Follow us: Instagram | Facebook | View us on Google Maps